You can tell a lot about a person by their shoes; we’ve all heard that old saying. And it’s true. Leaving a good first impression is important and looking put together is a sure way to achieve that. Choosing comfortable work shoes for men is a good start, but it takes a little more than that. Making sure your shoes are in pristine condition will ensure you leave a shining impression. (Pun intended.)
Clean, shiny shoes show a level of sophistication and self-care, so you want to have polished shoes at all times. If you rely on men’s work footwear for long hours on your feet, regular maintenance and proper care can keep them looking sharp and lasting longer.
Aside from making you look good, shoe shining has other benefits. It can prolong the life of your shoes, and it’s a relatively simple process. In this article, we’ll guide you through everything you need to know about shining shoes, from the required supplies to how to polish shoes step-by-step.
Why It’s Important to Polish Your Shoes
There are many reasons why shoe polishing is important.
- As we’ve mentioned before, it helps you make a good impression.
- It also prolongs your shoes' lifespan. The leather on your boots is protected from water and dirt when you regularly shine them, and this will prevent cracks and creases.
- Regular shoe shining will also maintain the color of your shoes.
The best news is that shoe shining is relatively simple and doesn’t require much time or effort. This is a quick and simple way to elevate your look. So, a high-quality shoe that needs some polishing is still a pretty low-maintenance shoe.
[prc-collections-carousel]
What Types of Shoes Need Polishing
You might be wondering if your new shoes require shining and care. Generally, any shoe with a leather upper can be polished. This includes leather dress shoes, leather Wellington boots, loafers, oxford work shoes, and brogues.
If your shoe has a fabric upper, you don’t need to polish it. In fact, polishing it will likely damage the fabric. So, the material has much to do with how you're supposed to care for your shoes.
What Can You Use to Polish Shoes? - Essential Shoe Shine Supplies
The good news is that you probably have most, if not all, of the supplies already in your home. So you're pretty much ready to start. Here’s what you need for proper leather shoe care:
- A shoe brush: You can use a horsehair shoe brush, a synthetic brush, or any long-bristled softer brush. Do you need a brush to polish shoes? No, you can also use an old toothbrush if you don’t have a shoe brush.
- A shoe polish: You can use cream, wax, or liquid shoe polish. If you’re using a cream or wax shoe polish, you will also need a shoe polish rag.
- A shoe buffer: This is optional but will help you get a high shine. A shoe buffer is a piece of soft cloth that you attach to your drill (it's not as scary as it sounds, don't worry).
Now we can move on to explaining how to polish shoes. Shall we?
A Step-by-Step Guide to Polishing Shoes
Remove Laces and Fill Your Shoes
Before cleaning and polishing your shoes, you should quickly prepare them for the process. The preparation stage includes removing the laces from your shoes. This ensures that the laces don't get covered in polish - they don't need shining.
Next, just stuff your shoe. Put some paper into the toes of the shoes. This will make your job easier as you'll have a firm surface once you start polishing.
Removing Dirt and Debris
The first step is removing any dirt or debris from your shoes. The easiest way to do this is to use a welt brush and water. If you don’t own a shoe brush, you can simply use an old toothbrush. Just make sure it’s clean!
Start by brushing the shoe in a circular motion to loosen the dirt. Then, flip the shoe over and repeat on the other side. Pay extra attention to the welt and brush off any dirt settled in there.
If your shoes are particularly dirty, you may need to use a shoe cleaner before polishing them. You can either use a shoe cleaner spray or a shoe cleaning kit. Be sure to follow the instructions on the shoe cleaner before using it.
Make sure there are no specs of dirt left on your shoes - they can scratch the leather while shining. Do a final wipe with a clean, dry cloth.
Let Your Shoes Dry
If you've used water or liquid cleaning supplies to remove dirt and debris from your shoes, don't apply shoe polish immediately. Let your shoes dry first before moving on to the next step.
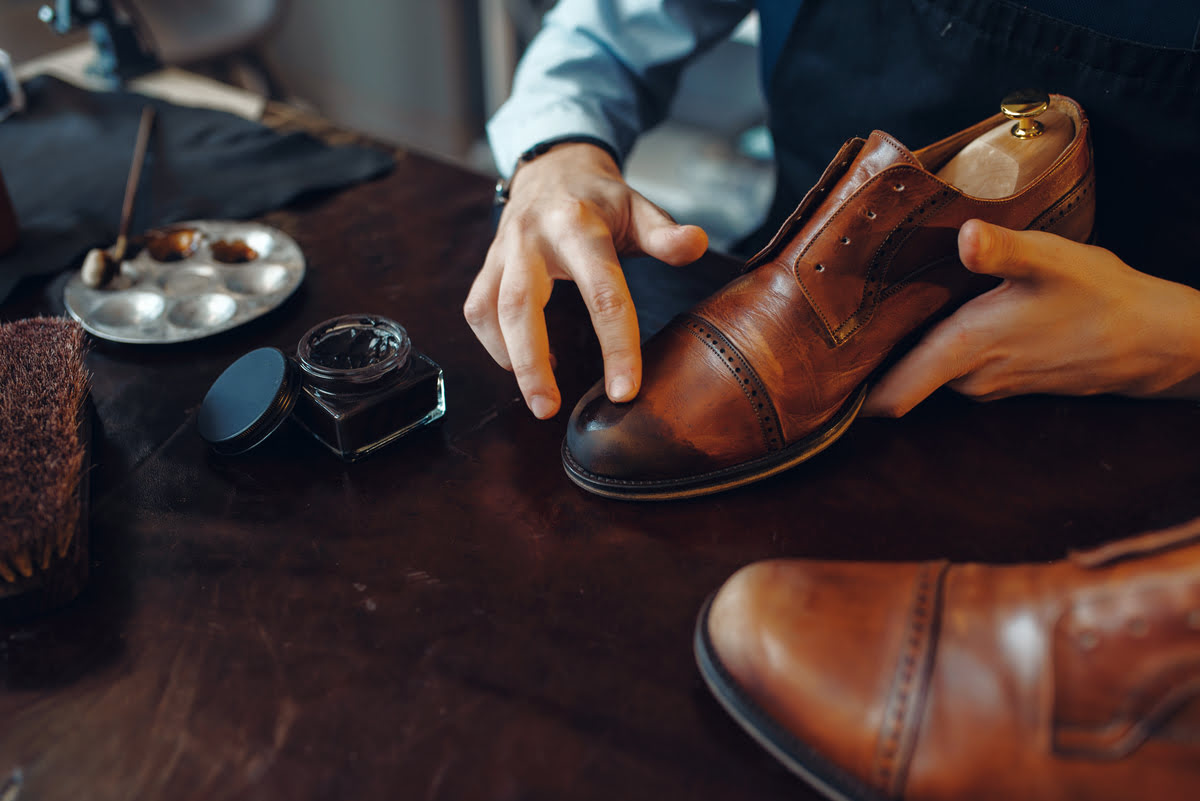
Apply the Polish
Now that your shoes are clean, you can start polishing them. If you’re using a cream or wax shoe polish, you will need a polishing cloth. If you don’t have a polishing cloth, you can use an old t-shirt or a piece of cotton fabric.
- Apply the polish to the polishing cloth and rub it into the shoe in a circular motion. Be sure to cover the entire shoe, including the heel and toe.
- Once you’ve applied the polish, let it sit for a few minutes so it can absorb into the leather.
- If you’re using liquid shoe polish, you can apply it directly to the shoe with a cloth or brush. Be sure to follow the instructions on the polish before using it.
Pro tip: Use a cotton swab or a toothbrush to apply the polish to the small, hard-to-reach areas like the tongue.
Layering the Polish
Something you have to know when learning how to polish shoes is layering. If you want to coat your shoes with polish a few times, you need to be patient. After applying a layer of polish, wait for it to dry. Once it's dried, you can apply the next layer to the shoes. You can repeat this process until you get your desired color. And remember - it's better to apply several thin layers than one thick layer.
Buff Your Shoes for Extra Shine (Optional)
[prc-collections-carousel]
Once you’ve applied the shoe polish, you can start buffing the shoe. This is optional, but it will help you achieve a high shine. You can use a soft cloth if you don’t have a shoe buffer.
Attach the shoe buffer to your drill and turn it on to the lowest setting. Hold the shoe buffer against the shoe and move it in a circular motion. Be sure to buff the entire shoe, including the heel and toe. Once you’re finished buffing, turn off the drill and remove the shoe buffer.
If you want, you can skip this step. Your shoes will still look good; they just won’t be as shiny.
Use a Shoe Brush to Clean Up
Once you’ve finished polishing your shoes, you can clean up any excess shoe polish. The easiest way to do this is to use a shoe brush. Brush the shoe in a circular motion until all excess polish has been removed. You can also use a clean cloth to remove any excess shoe polish.
Dry the Shoes and Re-lace Them
Almost done! Now that you've applied all the layers you wanted and buffed the shoes, it's time to let it all dry. Once your boots are shiny and dry, it's time to re-lace them.
How to Make the Shine Last Longer
To make the shine last longer, it’s best to apply a shoe cream or shoe wax. This will help create a barrier between the shoe and the dirt and debris. Be sure to follow the shoe cream or wax instructions before using it.
Pro tip: You can extend the life of your shoe shine by using a shoe spray. Spray it on after you’ve cleaned and polished your shoes.
How Often Should You Polish Your Shoes?
You don’t need to shine your shoes every day. How often you need to polish your shoes depends on how much you wear them. If you wear your shoes daily, you will need to shine them every 4-6 weeks. But if you only wear them once in a while, you can get away with shining them once a month or so.
You can also use shoe polish to touch up your shoes in between shines. This is a good idea if you notice any scuffs or marks on your shoes. Just apply a small amount of shoe polish to the affected area and buff it out. This will help keep your shoes looking shiny and new. With a little elbow grease, you can achieve an incredible shine that will last for weeks.
You're Ready to Shine
So there you have it - everything you need to know about shining your shoes. Just be patient, take your time, and follow the instructions on the shoe polish. Now that you’ve learned how to polish shoes and care for them, you can check out our incredible boot collections and get a pair of your dream shoes, knowing they will last you for ages.