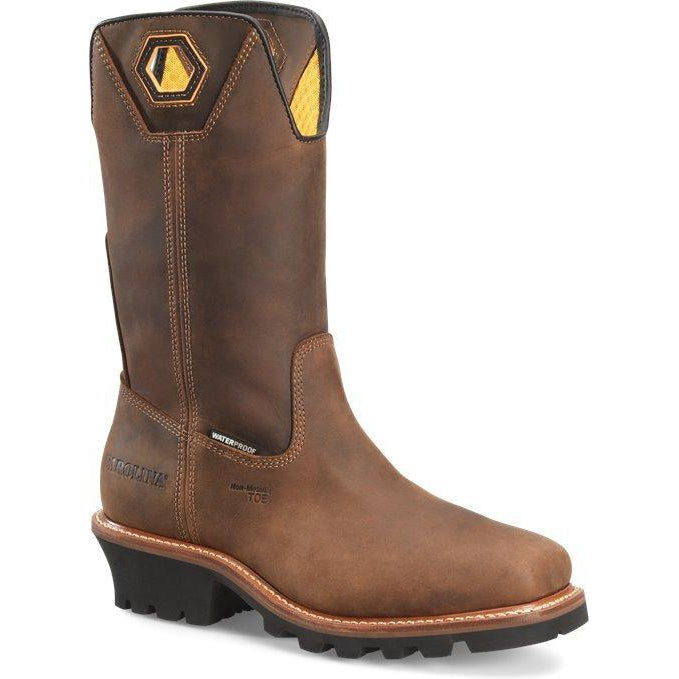
We get it; you've probably been rocking the same old lacing method since you were knee-high, but what if we told you there's a world of lacing possibilities out there? Besides the standard lacing method for a pair of boots you were taught at a young age, there are other ways of lacing work boots, each with its own advantages.
Buckle up (or should we say lace up?) because we're about to show you how to lace work boots using the five best boot-tying methods and discuss the advantages and disadvantages of each one. At the end of the day, it's up to you how to lace your boots.
Some of the more complex ones take a bit more time and effort to handle, but these game-changing lacing methods will not only make your boots fit like a glove but also take your comfort and safety to the next level.
Mastering the Art of Work Boot Lacing: 5 Expert Boot Lacing Techniques
Imagine you've got a pair of laces and a trusty pair of safety boots – seems pretty straightforward, right? Well, it's not that simple; how you lace your boot matters, too! Believe it or not, a tiny tweak in your lacing style can completely transform your footwear experience.
In this boot-lacing guide, we'll delve deep into different lacing styles, transforming your humble pair of laces into tools of unparalleled comfort and safety. Ditch those flimsy, flop-around loose laces! It's time to upgrade your boot game, say goodbye to tripping hazards, and hello to rock-solid confidence in every step you take. So, how do you lace a work boot?
Whether you're rocking military boots, hiking boots, or any other type of work boots, let's learn how to lace up for unmatched stability!
[prc-collections-carousel]
Who Needs to Learn How to Lace Work Boots?
This blog is tailor-made for those who don't just wear work boots but truly rely on them. We're talking about outdoor enthusiasts and hardworking professionals who brave the daily grind in construction sites, farms, oil rigs, factories, and beyond. If you've ever experienced the discomfort of ill-fitting boots or worried about the security of your footing, you're in the right place.
We get it – the struggle is real. That's why we're here to help you tackle those pain points head-on. Whether you're on your feet all day or tackling rugged terrain, our lacing methods are here to make your life easier, and your boots feel like a second skin.
2-1-3 Lacing
People who don't like their boots to be too tight and cause the so-called “lace bite” prefer lacing their boots in the 2-1-3 lacing pattern. You could try to apply this popular method to higher boots, like these logger boots, but it works for any other boot just as well, including custom work boots.
Advantages of 2-1-3 Lacing
Using the 2-1-3 lacing method, your feet will feel more comfortable but still secure. You won't feel the unpleasant pinching or foot pain that can happen when your boots are laced too tightly. This is especially important if you plan on staying on your feet for long periods of time, which usually leads to foot discomfort.
The kinds of boot laces you have don't matter; you can use this technique with any laces for boots. Be it original laces or spicing things up with some aftermarket flair, this technique plays nice with them all.
Disadvantages of 2-1-3 Lacing
This lacing technique might give your brain a little workout at first, but you should quickly get the hang of it after a few tries! Your heel won't be as snug as if you used some other technique, but it will still provide adequate support.
Instructions for 2-1-3 Lacing
You need to find the three eyelets that go around your ankle, close to the top of your boot tongue. Lace your boots normally until you get to the bottom of one of these three eyelets. Use the standard criss-cross lacing pattern, but don't thread the lace through each eyelet in order.
Instead, first, go for the middle eyelet, then for the bottom one, and then the third, top one. This is why it's called the 2-1-3 – if you count from the bottom, you go for the second eyelet first, then the first one, and next the third one. That's all there is to it. The inside of your boots should now feel more comfortable without sacrificing security.
The Heel-Lock Lacing Method
This method is preferred by people who wear their boots outside in rugged terrain, especially those rocking logger boots. It's not important whether your boots have eyelets or hooks. It is called the "heel lock" for a reason – it provides a tighter hold on your heels to avoid slips and trips on uneven terrain and slippery surfaces.
Advantages
This lacing method will make your tie more secure and keep your heels tighter. There will be less movement in the boot, so your feet will be safely wrapped in a solid grip when walking on dangerous terrain where a single slip can cause injury. It's quite easy to do, as it involves only the top two hooks or pairs of eyelets.
The heel-lock is usually used to lace hiking boots and hunting boots, as they need extra security and their foothold to be as secure as possible. You don't want any ankle injuries to happen outside in hard-to-access locations. This method provides more boot ankle support than other methods.
Disadvantages of the Heel-Lock Method
There aren't many disadvantages to the heel-lock. Sure, it might demand a smidge more of your precious time than your run-of-the-mill lacing, but hey, quality takes time, right? And the snug fit? Well, you've got to walk that fine line to avoid lacing it too tight, causing circulation problems, but it's easily avoided by adjusting it to individual feet and foot shape.
Instructions for the Heel-Lock Lacing Technique
The heel-lock method is a vertical lace technique that involves only the top two eyelets (the last pair of eyelets). So, how do you lace work boots to heel lock? You know how to lace work boots, so lace them up from the bottom like you usually do until you get to the top. Once you get there, each lace needs to go up vertically into the last eyelet.
The last two ankle eyelets should not have a classic criss-cross method pattern on the outside. The lace goes straight up from the bottom eyelet to the last one. Next, each lace goes under the vertical eyelet line you just made on the opposite side – closer to the inside of your boot. Tie the usual bow tie to handle any excess lace, and you're good to go.
This method is not reserved for work boots only; you can lace running shoes the same way. Simply make sure that you are using the last two eyelets, as they are sometimes hard to spot on running shoes, and most people tend to ignore them.
Army Lacing Technique
As the name implies, this technique is often used by military personnel. It is meant to deal with the rigidness and inflexibility of the military boot style, but it makes a good choice for footwear such as logger boots for men or women or any robust, tough leather boots.
Considering the inherent flexibility of most running shoes and sneakers, the army boot lacing technique may not be the go-to choice for lacing them up.
[prc-collections-carousel]
Advantages of the Army Lacing Method
The main advantage of the army lacing technique is that it will not restrict the movement of the upper, making for a better fit. Other than that, this technique doesn't have many advantages over other techniques for how to lace boots described here.
Disadvantages of the Army Lacing Method
This method can take some time, especially if you are lacing high work boots for men or women. It doesn't offer as much ankle security or support and allows for more foot movement than other methods.
Instructions for the Army Lacing Technique
As usual, start from the bottom and thread the laces from inside to outside. Thread the laces upwards through the next pair of eyelets without crossing them in the criss-cross fashion, like in the standard criss-cross method. Then, thread the laces through the eyelets on the opposite side and do the same for the next set of eyelets, going vertically.
Continue until you reach the top, and then tie your hardy knot to finish things up. If you applied the technique correctly, all of the verticals should be on the outside, while all the crossovers are on the inside.
The Ladder Method

The ladder-lacing technique is probably the one that will keep your feet the most secure. If you're willing to invest some time and effort, this technique can work wonders. The ladder lacing method is often used by members of the military, as well as people working in other demanding industries, as once it is done properly, you don't have to worry about your boots untying or a lack of support.
What Is the Benefit of Ladder Lacing?
When you apply the ladder lace pattern, your feet are going to be as secure as it gets. Once you tighten your laces, they will hold on their own. If you plan on spending a lot of time moving on your feet, you will benefit from this lacing technique. It's also excellent for lacing logger boots, hunting boots, and tactical boots.
Disadvantages of the Ladder Technique
It is time-consuming, somewhat complicated, and can be hard to tighten properly once you are done with lacing your boots. However, if you do it correctly, the knot on your boots will hold no matter what you do with it. Additionally, you should get high-quality work boot shoelaces for this technique to make the most out of it.
Instructions for the Ladder Method
Start from the bottom eyelet and thread the lace from inside to outside. Next, the lace goes straight up vertically, this time from outside to inside. Now, don't continue lacing upwards, but thread the laces below the vertical lace lines you made on the opposite side.
This creates a locking lace pattern that will keep your work boot laces as tight as they can go. Continue working to the top of your boots and finish with your regular firm knot or tie. If you're wondering how to lace work boots for men and women who need all the safety they can get, this technique is a top choice.
Last But Not Least Important: The Classic Criss-Cross Lacing Method
When it comes to lacing up your work boots, the classic criss-cross lacing method is like your trusty old sidekick. It's the common criss-cross or over-under technique that forms the well-known consistent crossing patterns.
Advantages of the Criss-Cross Technique
The tried-and-true criss-cross standard lacing offers simplicity and reliability. It evenly distributes pressure, ensuring a snug fit without sacrificing comfort. It's a versatile shoe-lacing method suitable for various boot styles and occasions, making it a go-to choice for many.
Disadvantages of the Criss-Cross Pattern
While the criss-cross method is dependable, it doesn't provide the same level of ankle support as some other techniques. The distinctive-looking patterns may not appeal to those seeking a minimalist or sleek look for their boots.
Instructions for Clean-Looking Criss-Cross Lacing
Start with the laces running straight across the bottom eyelets. Cross the right lace over to the left side and thread it through the left bottom eyelet. Repeat the process with the left lace, crossing it over to the right side and threading it through the right bottom eyelet.
Continue this criss-cross pattern, alternating sides and threading through each corresponding eyelet. Finish it up by tying your laces securely and adjusting the tension for a comfortable fit, and you'll be good to go!
Choose Your Method: Lace Up for Maximum Comfort & Support
Whether you're lacing tactical boots, logger boots, or regular shoes from your favorite boot brands, you should always choose the lacing method that makes you feel the most comfortable. It also doesn't matter if you’re lacing boots for men or women – go for the one that matches your specific needs.
Each technique offers something different. Once you try them out and master shoe lacing, the next step is trying out different work boot shoelaces, as they can also affect how your boots fit. After all, having top-notch support and safety is why you’re trying out different lacing techniques in the first place.
Don't get 'tongue-tied' – master work boot lacing like a pro!
FAQ
Any more questions about how to lace work boots? Get them answered below.
What Is the Most Effective Way to Lace Boots?
The most effective way to lace boots depends on your personal needs and job requirements. Different lacing methods offer various benefits, so choose one of the above that suits your comfort and support preferences.
Should Work Boots Be Laced Tight?
Yes, work boots should generally be laced tight for proper support and to prevent your feet from sliding inside the boots. However, the level of tightness can vary based on personal comfort. Strive for the right balance between a snug fit that provides a secure step without veering into the territory of blisters, pain, or discomfort.
How Do You Hide Boot Laces?
To hide boot laces, you can tuck them into the sides of your boots between the tongue and the outer leather. This keeps them neatly concealed for a clean look.
How Do You Tie a Lace Knot on a Boot?
Tying a lace knot on a boot is simple. After lacing your boots, make a basic shoelace knot by crossing one lace over the other and pulling it through the loop formed. Tighten it to your desired level of snugness.
Do You Lace Boots Over or Under?
Whether you lace boots over or under depends on the specific boot-lacing method you opt for. Some methods involve crossing over the boot tongue, while others go under it. It's all about the style and support you prefer.
